Concrete Patio Crack Repair: A Comprehensive Guide to Restoring Your Outdoor Space
A concrete patio offers a durable and versatile outdoor space for relaxation and entertainment. However, over time, cracks can appear due to various factors such as weather changes, ground movement, or improper installation. Addressing these cracks promptly is crucial to prevent further damage and maintain the integrity and aesthetic appeal of your patio. This comprehensive guide will provide you with the knowledge and steps needed for effective concrete patio crack repair.
Understanding Concrete Patio Cracks
Before diving into the repair process, it’s important to understand the different types of cracks that can occur in a concrete patio and their potential causes. This understanding will help you choose the most appropriate repair method.
Types of Cracks
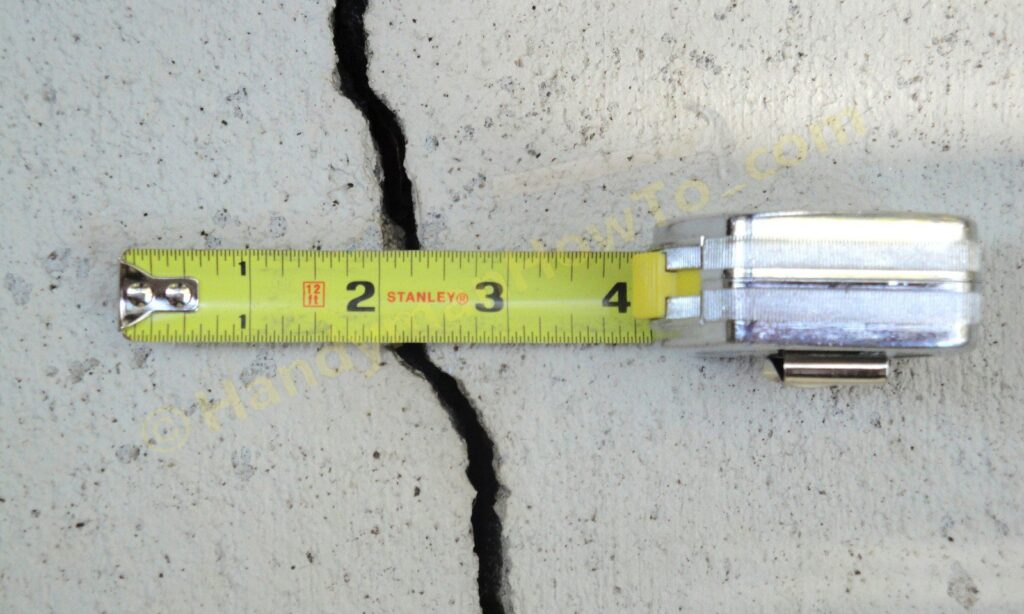
- Hairline Cracks: These are very thin cracks, usually less than 1/8 inch wide. They are often caused by shrinkage during the curing process and are generally not a structural concern.
- Structural Cracks: These cracks are wider than 1/8 inch and can indicate a more serious problem, such as settling or unstable soil conditions. They can compromise the structural integrity of the patio.
- Settlement Cracks: These cracks occur when the ground beneath the patio shifts or settles unevenly. They are often accompanied by noticeable changes in the patio’s level.
- Surface Cracks: These cracks are limited to the surface of the concrete and are often caused by freeze-thaw cycles or surface wear.
Causes of Cracks
- Shrinkage: As concrete cures, it shrinks, which can lead to hairline cracks.
- Temperature Changes: Expansion and contraction due to temperature fluctuations can cause stress and cracking.
- Ground Movement: Shifting soil or unstable ground can cause significant cracks.
- Improper Installation: Inadequate base preparation, incorrect concrete mix, or poor finishing can all contribute to cracking.
- Freeze-Thaw Cycles: Water that penetrates the concrete freezes and expands, putting pressure on the material and leading to cracks.
Tools and Materials for Concrete Patio Crack Repair
Having the right tools and materials is essential for a successful concrete patio crack repair. Here’s a list of what you’ll need:
- Safety Glasses and Gloves: To protect your eyes and hands.
- Wire Brush: For cleaning the cracks.
- Shop Vacuum: To remove debris from the cracks.
- Chisel and Hammer: For widening cracks if necessary.
- Concrete Crack Filler: Choose a filler appropriate for the size and type of crack. Options include concrete caulk, epoxy, or patching compound.
- Trowel or Putty Knife: For applying and smoothing the filler.
- Water: For mixing and cleaning.
- Concrete Sealer: To protect the repaired area and prevent future damage.
- Mixing Bucket: If using a patching compound that requires mixing.
Step-by-Step Guide to Concrete Patio Crack Repair
Follow these steps to effectively repair cracks in your concrete patio:
Step 1: Prepare the Area
Begin by thoroughly cleaning the area around the crack. Use a wire brush to remove any loose debris, dirt, or old sealant. Then, use a shop vacuum to remove any remaining particles from inside the crack. This ensures that the filler will properly adhere to the concrete.
Step 2: Widen the Crack (If Necessary)
For larger cracks, it may be necessary to widen them slightly to create a better surface for the filler to bond to. Use a chisel and hammer to carefully widen the crack, creating a V-shaped groove. This provides a larger surface area for the filler and helps to prevent future cracking.
Step 3: Mix the Filler (If Applicable)
If you’re using a patching compound that requires mixing, follow the manufacturer’s instructions carefully. Add water to the dry mix in a mixing bucket and stir until you achieve a smooth, consistent paste. Avoid adding too much water, as this can weaken the filler.
Step 4: Apply the Filler
Using a trowel or putty knife, carefully apply the filler to the crack. Press the filler firmly into the crack to ensure that it fills the entire space. For deeper cracks, you may need to apply the filler in layers, allowing each layer to dry before applying the next. Make sure the concrete patio crack repair is flush with the existing surface.
Step 5: Smooth the Surface
Once the crack is filled, use the trowel or putty knife to smooth the surface of the filler. Remove any excess filler and create a smooth, even transition between the filler and the surrounding concrete. You can also use a damp sponge to further smooth the surface.
Step 6: Cure the Filler
Allow the filler to cure according to the manufacturer’s instructions. This may involve keeping the area damp for a certain period of time. Curing helps the filler to harden and bond properly to the concrete. The duration of the curing process will vary depending on the type of filler used.
Step 7: Apply a Concrete Sealer
After the filler has fully cured, apply a concrete sealer to the repaired area. This will help to protect the filler from moisture and other environmental factors. It will also help to prevent future cracking and extend the life of your concrete patio. Choose a sealer that is specifically designed for use on concrete surfaces.
Choosing the Right Concrete Crack Filler
Selecting the appropriate crack filler is crucial for achieving a durable and long-lasting repair. Here are some common types of fillers and their best uses:
- Concrete Caulk: Ideal for hairline cracks and small surface cracks. It’s flexible and easy to apply, but it may not be suitable for larger cracks.
- Epoxy: A strong and durable option for larger cracks and structural repairs. It provides excellent adhesion and resistance to moisture.
- Patching Compound: A versatile option for a variety of crack sizes. It’s easy to mix and apply, and it can be used to repair both surface and structural cracks.
- Self-Leveling Sealant: Best for horizontal cracks in driveways and patios. It flows easily into the crack and creates a smooth, level surface.
Preventing Future Cracks in Your Concrete Patio
While concrete patio crack repair is essential for maintaining your outdoor space, preventing cracks from forming in the first place is even better. Here are some tips to help prevent future cracking:
- Proper Installation: Ensure that your patio is installed correctly with a proper base and adequate drainage.
- Control Joints: Install control joints to allow for expansion and contraction due to temperature changes.
- Seal the Concrete: Apply a concrete sealer regularly to protect the surface from moisture and other environmental factors.
- Avoid Heavy Loads: Avoid placing heavy loads on the patio, as this can cause stress and cracking.
- Proper Drainage: Ensure that water drains away from the patio to prevent freeze-thaw damage.
When to Call a Professional
While many concrete patio crack repair projects can be tackled by homeowners, there are certain situations where it’s best to call a professional. These include:
- Large or Structural Cracks: If you have large or structural cracks that are more than 1/4 inch wide, it’s best to consult with a professional.
- Settlement Issues: If your patio is settling or sinking, it’s important to address the underlying issue before attempting to repair the cracks.
- Extensive Damage: If your patio has extensive damage, it may be more cost-effective to replace it entirely.
- Lack of Experience: If you’re not comfortable working with concrete or you lack the necessary tools and equipment, it’s best to hire a professional.
The Cost of Concrete Patio Crack Repair
The cost of concrete patio crack repair can vary depending on the size and severity of the cracks, the type of filler used, and whether you hire a professional. DIY repairs can range from $20 to $100 for materials, while professional repairs can cost anywhere from $100 to $1000 or more, depending on the extent of the damage. Consider the cost of materials, time investment, and potential for errors when deciding whether to DIY or hire a professional.
Conclusion
Concrete patio crack repair is a crucial aspect of maintaining your outdoor space. By understanding the types and causes of cracks, choosing the right tools and materials, and following the steps outlined in this guide, you can effectively repair cracks and prevent further damage. Remember to prioritize safety, take your time, and don’t hesitate to call a professional if you’re unsure about any aspect of the repair process. Addressing cracks promptly will not only improve the appearance of your patio but also extend its lifespan and ensure its structural integrity. With proper care and maintenance, your concrete patio can provide you with years of enjoyment.
By following these guidelines, you can ensure that your concrete patio crack repair is done correctly and that your patio remains a beautiful and functional part of your outdoor living space. Remember to regularly inspect your patio for cracks and address them promptly to prevent further damage. A well-maintained concrete patio adds value to your home and provides a comfortable and inviting space for relaxation and entertainment. [See also: Concrete Patio Maintenance Tips] [See also: Choosing the Right Concrete Sealer]
