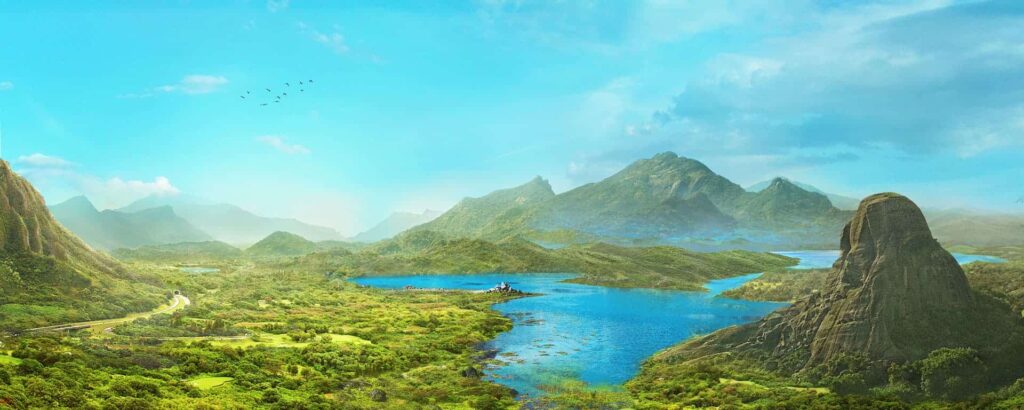
Mastering Landscape Photography in Photoshop: A Comprehensive Guide
Landscape photography, with its breathtaking vistas and serene compositions, captures the beauty of the natural world. However, even the most stunning raw images often benefit from post-processing to enhance their impact and convey the photographer’s vision. Adobe Photoshop, with its powerful tools and versatile features, is the industry standard for landscape photo editing. This comprehensive guide will walk you through the essential techniques for transforming your landscape photography in Photoshop, from basic adjustments to advanced manipulations, ensuring you create images that truly stand out.
Understanding the Basics of Photoshop for Landscapes
Before diving into specific techniques, it’s crucial to understand Photoshop’s interface and fundamental concepts. This includes navigating the menus, understanding layers, and working with adjustment layers. Familiarity with these basics will streamline your workflow and allow for more precise edits. Also, understanding color profiles and their impact on your final image is essential. Choosing the correct color profile ensures accurate color representation across different devices and printing mediums. For most web purposes, sRGB is sufficient, while Adobe RGB or ProPhoto RGB offer a wider color gamut for print.
Setting Up Your Workspace
Customizing your workspace to suit your editing style can significantly improve efficiency. Arrange your panels in a way that makes the tools you use most frequently easily accessible. Consider creating custom keyboard shortcuts for common tasks to further speed up your workflow. Also, consider utilizing the ‘Actions’ panel to automate repetitive tasks and maintain consistency across multiple images. This can be especially useful when applying similar adjustments to a batch of photos.
Essential Adjustments for Landscape Photos
The foundation of any good landscape edit lies in making subtle adjustments to exposure, contrast, and color balance. These fundamental tweaks can dramatically improve the overall look and feel of your images. Mastering these techniques is key to bringing out the best in your landscape photography in Photoshop.
Exposure and Contrast
Exposure adjustments control the overall brightness of the image. Use the Levels or Curves adjustment layers to fine-tune the highlights, midtones, and shadows. Contrast adjustments increase the difference between the light and dark areas, adding depth and dimension. Be careful not to overdo it, as excessive contrast can lead to harsh and unnatural-looking results. Subtle adjustments are often the most effective. Consider using the ‘Shadows/Highlights’ adjustment to recover detail in overly dark or bright areas. This tool is particularly useful for balancing the exposure in high-contrast scenes.
Color Balance and White Balance
Achieving accurate color balance is essential for creating realistic and visually appealing landscape photos. Use the White Balance adjustment to correct any color casts and ensure that the colors appear natural. Experiment with different presets or manually adjust the temperature and tint sliders to achieve the desired look. Furthermore, the Color Balance adjustment layer allows you to fine-tune the colors in the shadows, midtones, and highlights independently, providing greater control over the overall color palette of your image. Understanding the color wheel and how different colors interact with each other is crucial for making informed decisions about color adjustments.
Advanced Techniques for Enhancing Landscapes
Once you’ve mastered the basics, you can move on to more advanced techniques that can take your landscape photography in Photoshop to the next level. These techniques include selective adjustments, sharpening, and noise reduction.
Selective Adjustments with Masks
Masks allow you to apply adjustments to specific areas of your image without affecting the rest. This is particularly useful for targeting specific elements, such as the sky, foreground, or individual trees. Use the Brush tool to paint directly onto the mask, or create selections using the Lasso tool or Quick Selection tool. Gradient masks are also useful for creating smooth transitions between different areas of adjustment. For example, you can use a gradient mask to darken the sky while leaving the foreground untouched. The ‘Select Color Range’ feature can be used to create masks based on specific colors in your image, allowing for precise adjustments to areas with similar hues. [See also: Advanced Masking Techniques in Photoshop]
Sharpening and Noise Reduction
Sharpening enhances the details in your image, making it appear crisper and more defined. However, excessive sharpening can introduce unwanted artifacts and noise. Use the Unsharp Mask filter or the Smart Sharpen filter to sharpen your images carefully. Noise reduction, on the other hand, reduces the amount of graininess or noise in your image, particularly in the shadows. Use the Reduce Noise filter or the Camera Raw filter to reduce noise while preserving detail. It’s important to strike a balance between sharpening and noise reduction to achieve the best possible results. Applying sharpening selectively to areas with fine detail, such as foliage or rocks, can enhance the overall sharpness of the image without introducing unwanted artifacts in smoother areas, such as the sky.
Working with RAW Files
Shooting in RAW format provides the greatest flexibility for post-processing, as it captures all the data from the camera sensor. When opening a RAW file in Photoshop, it will automatically open in Adobe Camera Raw (ACR), a powerful tool for making initial adjustments to exposure, color, and detail. ACR allows you to recover highlights and shadows, adjust white balance, and reduce noise before even opening the image in Photoshop. These initial adjustments can significantly improve the overall quality of your image and provide a solid foundation for further editing in Photoshop. Understanding the capabilities of ACR is essential for maximizing the potential of your RAW files. Key adjustments in ACR include: Temperature, Tint, Exposure, Contrast, Highlights, Shadows, Whites, Blacks, Clarity, Vibrance, and Saturation. [See also: Understanding RAW vs JPEG]
Creating Dramatic Skies
The sky is often a focal point in landscape photography. Enhancing the sky can dramatically improve the overall impact of your images. This can be achieved through various techniques, including adjusting the color, contrast, and detail. Replacing the sky altogether is also a popular technique, allowing you to create dramatic and surreal effects. This method requires precision and careful blending to ensure a seamless and realistic result. Consider using images of skies captured under similar lighting conditions to maintain a natural look. Tools like the ‘Sky Replacement’ feature in Photoshop can automate much of the process.
Color Grading and Tone Mapping
Color grading involves adjusting the colors in your image to create a specific mood or aesthetic. This can be achieved using various adjustment layers, such as Color Balance, Hue/Saturation, and Selective Color. Tone mapping, on the other hand, involves adjusting the tonal range of your image to create a more dramatic or surreal effect. This can be achieved using the HDR Toning filter or by manually adjusting the Curves layer. Experiment with different color grading and tone mapping techniques to find what works best for your style. The ‘Split Toning’ feature allows you to add different colors to the highlights and shadows, creating a unique and stylized look. Subtle color grading can enhance the overall mood of your image, while more dramatic color grading can create a more surreal or artistic effect.
Retouching and Removing Distractions
Often, landscape photos contain unwanted elements, such as power lines, tourists, or blemishes. Retouching these distractions can significantly improve the overall composition and visual appeal of your images. The Spot Healing Brush tool and the Clone Stamp tool are invaluable for removing these distractions. Use these tools carefully and subtly to avoid creating unnatural-looking results. Consider using content-aware fill for removing larger objects or areas. This feature analyzes the surrounding pixels and intelligently fills in the selected area, often producing seamless and realistic results. [See also: Advanced Retouching Techniques in Photoshop]
Final Touches and Exporting
Before exporting your final image, it’s important to perform a few final checks and adjustments. This includes checking for any remaining distractions, ensuring that the colors are accurate, and adding a final touch of sharpening. Once you’re satisfied with your image, you can export it in the desired format and resolution. For web use, JPEG is the most common format, while TIFF is preferred for printing. When exporting, be sure to choose the appropriate color profile and compression settings to ensure the best possible quality. Consider adding a watermark to protect your images from unauthorized use. Photoshop offers several options for adding watermarks, including text-based watermarks and image-based watermarks.
By mastering these techniques, you can transform your landscape photography in Photoshop and create stunning images that capture the beauty of the natural world. Remember to practice regularly and experiment with different techniques to develop your own unique style. Landscape photography in Photoshop is an art form in itself, and with dedication and practice, you can achieve truly remarkable results. Don’t be afraid to experiment and push the boundaries of what’s possible. The key is to develop your own unique style and vision.
